Time-based QR codes
One printed code that sends people to the right page for the date
What they do
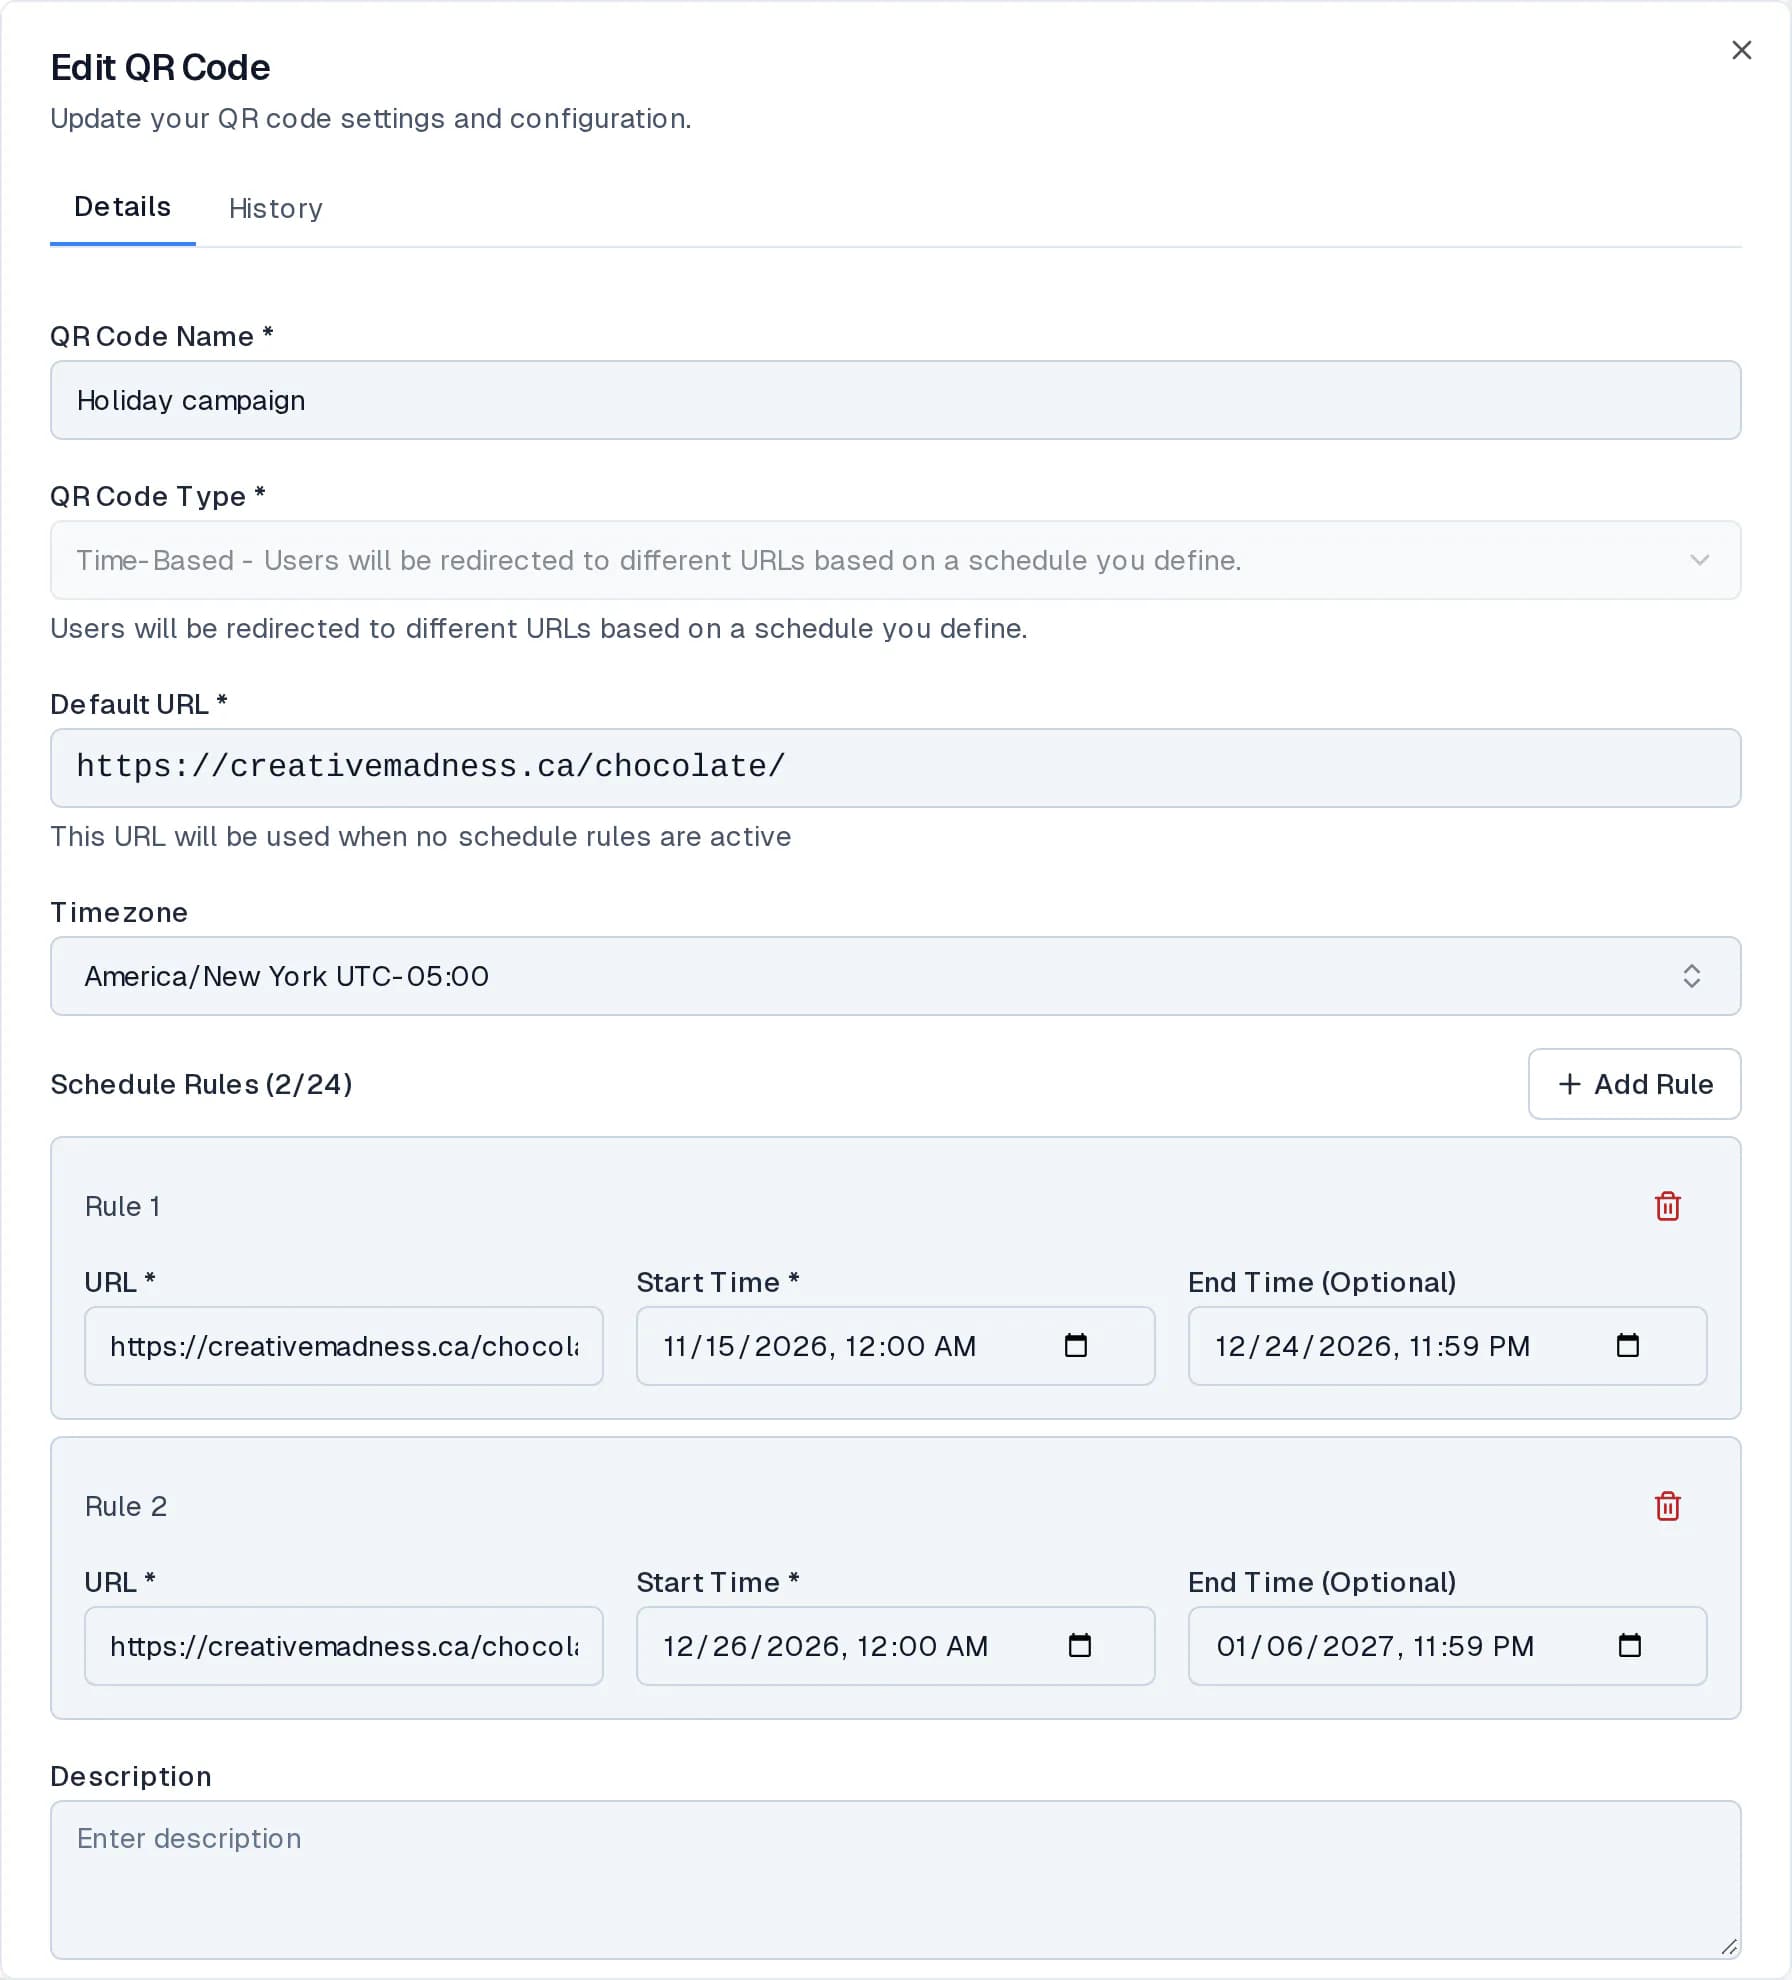
A time-based code has a default destination and a list of schedule rules. Each rule has its own URL, a start time and an optional end time. While a rule is active, scans go to its URL. When no rule is active, scans go to the default destination.
Packaging and point of sale material often stays in use for years. A time-based code lets the same print run promote a holiday gift guide in November and a new year box in January, then go back to your home page.
Set one up
- 1Create a QR code, or edit one, and choose the Time-Based type.
- 2Enter the default URL. It is used whenever no rule applies.
- 3Pick the time zone the schedule should follow, usually where your campaign runs.
- 4Choose Add Rule for each period, with its URL, start time and, if it should stop, an end time. A code can have up to 24 rules.
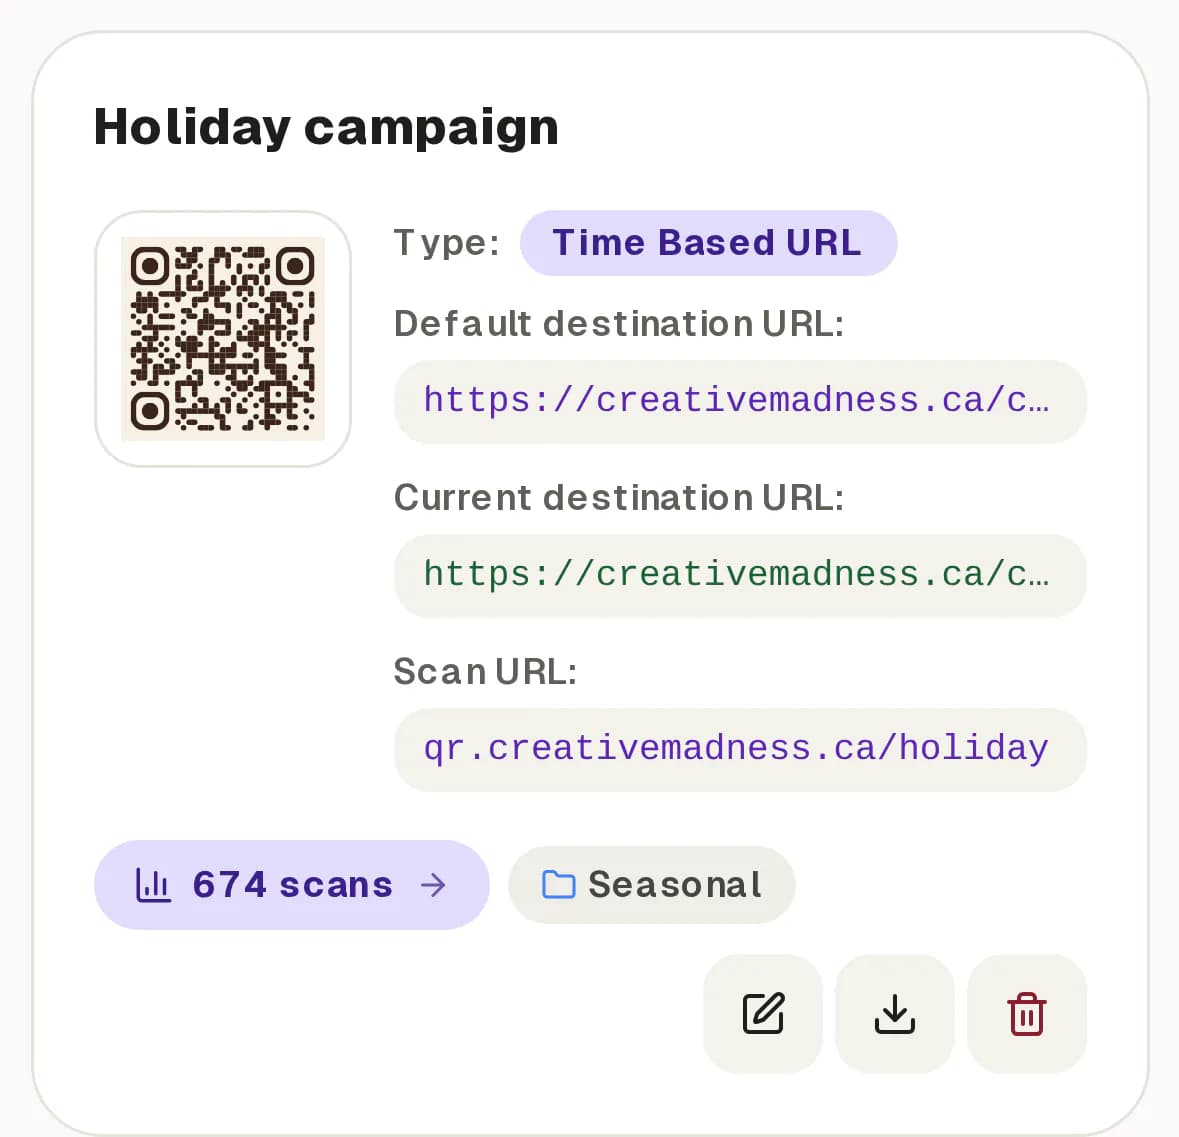
- 5Save. The card on your dashboard shows both the default destination and where the code points right now.
Good to know
- Rules follow the time zone saved on the code, not the time zone of the person scanning.
- If two rules overlap, check the order and dates before you print, then test by scanning on the first day of each period.
- Every change to the rules is kept in the code's history, so you can see who changed a date and restore an earlier version.